Let's start to create the java project with Maven and add some dependencies for your project. To proceed this, you should some IDE for creating the project, for mine, I'm gonna use Eclipse to create it. If you don't have the Eclipse IDE please click here to download.
After you had eclipse downloaded, let's extract it into your drive and launch the file exe of eclipse like this.

While you launching eclipse IDE it will ask for the workplace, you choose any path as you prefer.
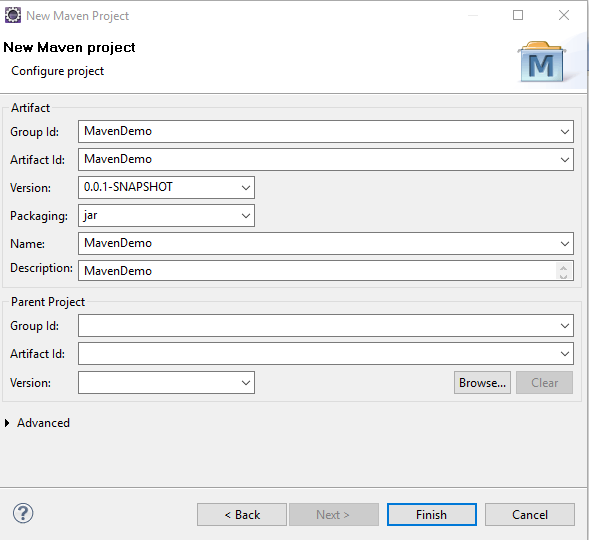
In Eclipse you can click: File -> New -> Maven Project -> Tick the box "create a simple project" and then you should some information as below:

It will download some file automatically, you can wait a bit and then you will see the project in the project explorer at your left side. Click on pom.xml to add some dependencies as you want. For add the dependencies you can add by code or by the wizard. After you click on pom.xml at the bottom:

You can add dependencies, for more about dependencies you can find it it Maven Site

After you had eclipse downloaded, let's extract it into your drive and launch the file exe of eclipse like this.
While you launching eclipse IDE it will ask for the workplace, you choose any path as you prefer.
In Eclipse you can click: File -> New -> Maven Project -> Tick the box "create a simple project" and then you should some information as below:
It will download some file automatically, you can wait a bit and then you will see the project in the project explorer at your left side. Click on pom.xml to add some dependencies as you want. For add the dependencies you can add by code or by the wizard. After you click on pom.xml at the bottom:

After you save, it will automatically download the dependencies. You can create another class to do your logic. As you can see Maven can help you easily no need to download the jar file and build path in Eclipse as before, you just add some xml code.


Great Article
ReplyDeleteJava Project Ideas for Final Year Students
FInal Year Project Centers in Chennai
JavaScript Training in Chennai
Java Training in Chennai